Recently some of my baby shower napkins were featured in an amazing first birthday photo shoot. Thanks to Marigold Mom and their Dreamy Navajo 1st Birthday Shoot I have a new listing available and some great pictures! You can see the whole shoot HERE
If you are interested in buying your own baby shower napkins inspired by this shoot you can get them here!
Friday, November 28, 2014
Monday, December 30, 2013
How to Make Your Own Rustic Wooden Breadboard Ipad Nook or Tablet Stand
Recently I was infatuated with a rustic tablet stand found on Pinterest. I didn't quite like the examples so I decided to make my own. I have a few friends and family with their own tablets so I thought it would make an awesome Christmas present! I was right and everyone loved them!!! They are so great for when you pull up a recipe on your tablet and don't want it laying flat on your counter top getting messed up. What's even better is they fold up and can be hung on a hook or tucked into a drawer when you don't need them.
How to put it together:
 |
| Here are three of the stands I personalized |
I ordered everything except the wood for the kickstand in the back online.
What you need to get started:
- Wooden bread board ( I got mine from and online web restaurant supplier for $6 a piece)
- Scrabble rack (I got 10 for under $5 on Amazon)
- Small wooden board that is 1/2" thick and 1 1/2" wide (Mine was from Lowes in the hardwood section. You can get them in whatever wood is closest to your board)
- Wood glue
- Easel Hinges ( I got mine for 60 cents on a woodworking website. They have little prongs that are on both sides.)
- Electric table saw
- Mallet
- Matching wood stain
- Optional: Electric burn tool or paint
How to put it together:
- Get your piece of wood ready and cut it to 6 1/4" at a 15 degree angle at the bottom.
- Mark the back of your board 7" up and place the closed hinge below that line.
- Take your wood glue and put a few small drops on either side of the hinge.
- Make sure your hinge and wood back is lined up on the board. Put the board on a flat surface like a good table with a flat piece of wood on it. Stone surfaces will make the board split when you tap the wood piece into place.
- Take another small piece of wood (could be the remnant of the piece you cut from) and place it above the wood piece. You should be looking at bottom to top: Table, Bread board, hinge, wooden kickstand, extra board. Make sure the extra board covers the hinge portion evenly.
- With a mallet hit the stack where the hinge is 2-3 good times to make sure the hinge grips into the breadboard and kickstand. If it doesn't take some more glue and put it in the holes the hinge makes and press everything back into place, then flip the whole thing over with the breadboard facing up.
- If you want to stain your scrabble rack and kickstand wait until the glue dries first (I would wait at least 6 hours). Lightly brush on your stain to the scrabble rack and back board on the top, bottom, front and back. After it dries check and reapply if needed.
- If you want to paint your board wait until hinge glue is dried. Paint all of your pieces, board, scrabble rack, and kickstand. For an antique white look: paint all over in an off white, let dry, go back and rub wood stain on the edges lightly and let dry. *Make sure there isn't any oil covering the breadboard. Some cutting boards come with a thin layer to treat the wood. If yours does then you will need to sand the board before you can start painting.
- Glue your scrabble rack on to your bread board by applying a thin layer of glue to the back of the rack and evenly placing it an inch above the bottom. Wipe away any excess glue from the sides of the rack if needed.
- If you want to personalize the stand you can paint initials or burn them in with a burn tool. When using a burn tool I suggest sketching out your design first in pencil then burning over it. After you're finished go back with a good eraser. *Always be cautious when using a burn tool. Never leave the tool unattended when on and never allow small children around it. It reaches several hundred degrees Fahrenheit and causes serious instant burns when it contacts the skin (trust me I know!)
You're all done!! Now go and put that stand to work!
Wednesday, October 16, 2013
10 Ways to use Palmetto Love Roses in Your Southern Wedding
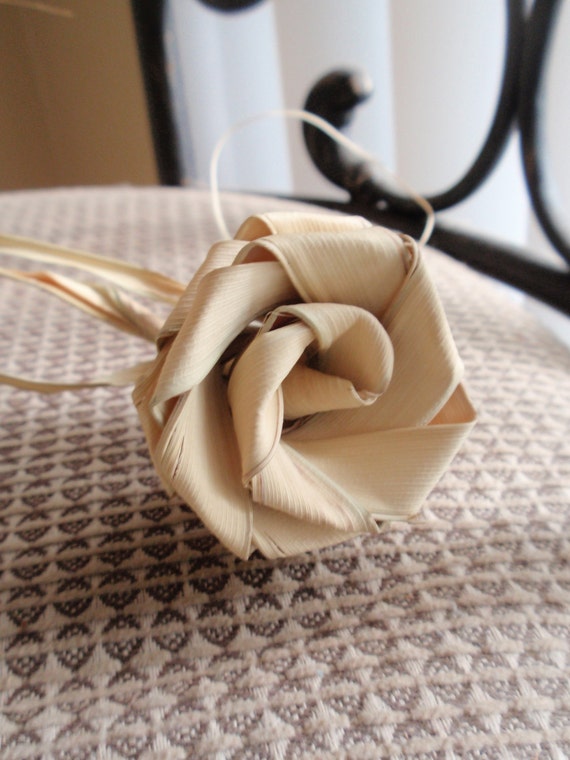
These beautiful roses are a Southern tradition harking back to the Civil War. Women would make them out of palmetto fronds and give them to the soldier they love. He was supposed to keep the rose with him always and bring it back to his love when he came home. The roses were supposed to last as long as their love. If you've ever taken a stroll in downtown Charleston you are likely to see vendors peddling these timeless works of art. Not only are they perfect for an alternative bouquet but the little flowers are great for many other uses in your wedding.
1. Alternative Bouquets
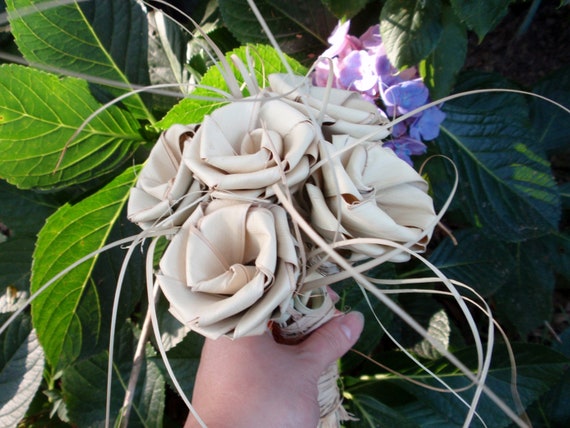 Since palm fronds won't wilt under the hot summer sun and can be made months in advance they are the perfect alternative to traditional flowers.
If you don't want all of your flowers to be the same or need a pop of color you can add them as a cool detail to a traditional bouquet. You can also try adding other dried flowers like baby's breath, tallow berries, pussy willow, or craspedia.
Using a natural or bright material to wrap the bottom of your bouquet adds interest as well. Burlap, ribbon, and raffia are all great choices!
2. Boutonnieres
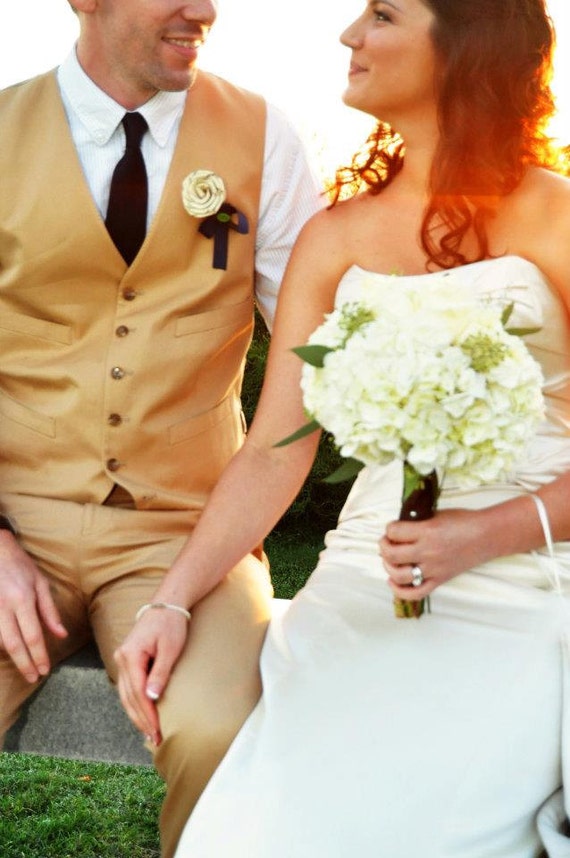 These roses aren't so girly or frilly that any man could balk at wearing one. They are neutral and can go with a tux or a seersucker suit. They can also be paired with other flowers or left alone and still look great! That's the beauty of these little palmetto roses. Your man wearing the love rose on their lapel is similar to how they would've been worn originally.

3. Hair Accessories
If you aren't into fascinators, veils, and tiaras a love rose in your hair may be a great choice! They can be pinned or clipped in a loose bun. The best part is it's durability. These flowers can take a beating without the petals falling off... if only a real rose could say the same!
4. Table Decor
You can put these babies anywhere and I mean ANYWHERE! You could hang them from the rafters if you wanted. The most obvious would be to make them into centerpieces for the tables. They would be great for decorating the pews or rows during your ceremony and since they don't require any water you can just tie them in a bow.
1. Alternative Bouquets
 Since palm fronds won't wilt under the hot summer sun and can be made months in advance they are the perfect alternative to traditional flowers.
If you don't want all of your flowers to be the same or need a pop of color you can add them as a cool detail to a traditional bouquet. You can also try adding other dried flowers like baby's breath, tallow berries, pussy willow, or craspedia.
Using a natural or bright material to wrap the bottom of your bouquet adds interest as well. Burlap, ribbon, and raffia are all great choices!
2. Boutonnieres
 These roses aren't so girly or frilly that any man could balk at wearing one. They are neutral and can go with a tux or a seersucker suit. They can also be paired with other flowers or left alone and still look great! That's the beauty of these little palmetto roses. Your man wearing the love rose on their lapel is similar to how they would've been worn originally.
3. Hair Accessories
If you aren't into fascinators, veils, and tiaras a love rose in your hair may be a great choice! They can be pinned or clipped in a loose bun. The best part is it's durability. These flowers can take a beating without the petals falling off... if only a real rose could say the same!
4. Table Decor
You can put these babies anywhere and I mean ANYWHERE! You could hang them from the rafters if you wanted. The most obvious would be to make them into centerpieces for the tables. They would be great for decorating the pews or rows during your ceremony and since they don't require any water you can just tie them in a bow.
5. Wedding Favors
Let your guests take home a real piece of history with a palmetto rose and a Thank you note and history attached by a ribbon.
6. Wedding Programs
Attach a palmetto love rose to each program, it can double as a favor this way and helps keep paper stiff with it's long stem. Tie with raffia or twine to add the to rustic feel!
7. Placeholders
Make a rustic statement by attaching your placeholders to a palmetto love rose. It can double as a wedding favor as well. By putting the rose on the table none of your guests will miss them at the end of the reception.
8. Flower Girl Basket
If you find a particularly talented basket weaver at the Charleston Market you can buy a basket with a palmetto love rose included in it.
9. Cake Topper
If you want your cake to match your bouquet you can make a little cake topper as well! It is safe to use on on food, and won't get messed up from being moved from cold to hot like some other flowers might. It is a ton cheaper than fondant flowers as well!
10. Alternative Ring Bearer Pillow
Thursday, June 27, 2013
Local Etsy Vendor Summer Shopping Spree!!!
I was just featured in the Charleston City Paper for my wedding decor. This is a great resource for finding local Charleston Etsy Vendors. There is something for everyone from jewelry to handmade wedding dresses. I personally know a few of these people so be sure to check it out!!!
http://www.charlestoncitypaper.com/charleston/a-local-etsy-summer-shopping-spree/Content?oid=4656329
Tuesday, June 4, 2013
Ordering and Calculating Wedding Napkins
I get questions and guesses from my customers all the time on how many napkins they REALLY need for their wedding reception. This is a complex question that takes more than a little guess work. Too few napkins and your guests are left high and dry. Too many napkins and you're using them in your kitchen well after the honeymoon. So how do you find the right number?
Cocktail Napkins:
Cocktail napkins are used for serving drinks, hors d'oeuvres and desserts. These are the most used napkins at a wedding so they require a little more planning than the other sizes.
 Luncheon napkins are typically served with lighter meals and cake. Dinner napkins are served with a heavy sit down dinner or buffet. If you are serving super messy foods like BBQ or lobsters at your reception you will probably need at least 2 napkins per guests. If you are having something more involved like an oyster roast or crawfish boil you will need at least 3 large napkins per person! You can use luncheon napkins if you are looking to save money. They aren't that much smaller than dinner napkins and are a reasonable size for any guests.
Cocktail Napkins:
Cocktail napkins are used for serving drinks, hors d'oeuvres and desserts. These are the most used napkins at a wedding so they require a little more planning than the other sizes.
- If you are having a cocktail hour or having one before a sit down meal you will need 2-3 cocktail napkins per guest per hour. Don't skimp on napkins if the hors d'oeuvres will be served by waiters since they will pass one out for each plate. Once guests eat the drinking should slow at least temporarily so plan maybe 1-2 per hour during those times. If your guests will be dancing the night away you can still plan on 1-2 napkins. You can pretty much count on 1-2 napkins per hour after the main meal is served.
- You can save yourself money by putting the cocktail napkins on the bar but ask the bartender not to automatically give them one unless the guest wants it. Many guests don't require a napkin for each drink especially if you are passing out koozies too.
- Cocktail napkins are also great for the cake table! The cake being served with cocktail napkins will save you money! Your guests don't need a huge napkin for a cupcake or a small sliver so why give them one?
- Here is an example wedding with a cocktail hour, a sit down dinner and 3 hours of mingling and dancing for 100 guests.
- ( cocktail hour) 2 napkins x 1 hour x 100 guests = 200 napkins
- (sit down dinner) 1 napkin x 1 hour x 100 guests = 100 napkins
- (mingling and dancing) 1 napkins x 3 hours x 100 guests = 300 napkins
- (cake) 1 napkin x 100 guests = 100 napkins
- This results in cocktail 700 napkins! That's a lot, so here are my suggestions for getting a more manageable number.
- Don't hand out a napkin with each drink. This should cut back on the number of napkins in half needed for the bar if your guests come up to the bar themselves. If you have waiters you should still hand them out.
- Realize that not all guests are going to want cake. You can reasonably guess only 60-75% of guests will actually eat it. You can factor that in when providing napkins at the cake table.
- If you use my napkin saving tips a wedding for 100 guests goes from 700 cocktail napkins to 460!
Dinner/Luncheon Napkins
Hand Towels
Hand towels are typically used in the bathroom or powder room at your wedding. These can be plain or personalized as the rest of your napkins. They are much larger and expensive. If you want to dress up the bathroom they're a great way to do it. If you're looking to save money they are the first thing to skimp on. Recycled hand towels work just as well and for a fraction of the cost ;)
If you are looking for personalized napkins like those shown above you can visit my regular website HandmadeNapkins.com or my Etsy site www.CharlestonCharms.Etsy.com. I would love to answer any questions you might have about ordering.
Monday, June 3, 2013
New Nautical Wedding Napkins!
My newest creations involve some really amazing vintage looking nautical stamps. I am so excited about these napkins. I think they turned out fun and elegant with just the right touch of preppy. Every Charlestonian knows that is the key to success ;)
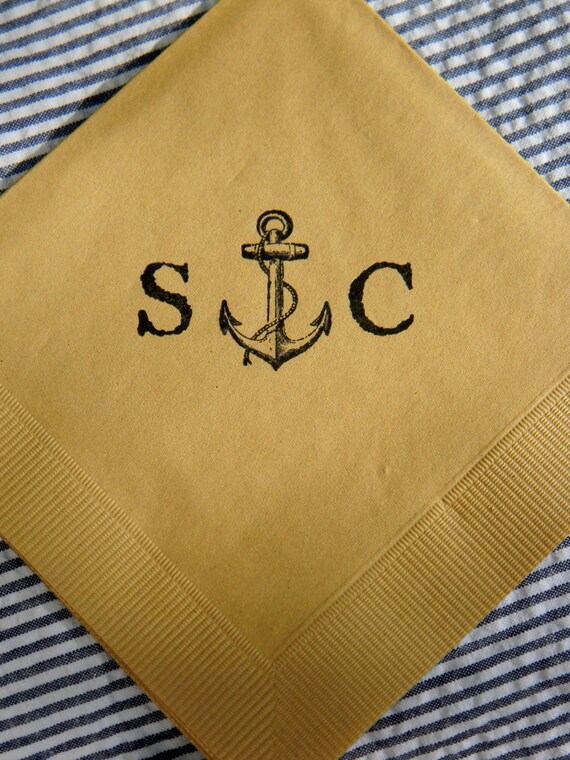
Personalized Anchor Napkins with Couple's initials
These napkins feature a vintage looking anchor and rope in the center flanked by the couple's initials. These are the ultimate nautical napkins. Anchors are a symbol of stability and strength even in the worst storms. What could be a better symbol for a lasting marriage? The last name initial can be added below the anchor. If you wanted them for a baby shower or birthday a 3 initial monogram can be placed under the anchor instead. This napkin is shown in light burlap with black ink.
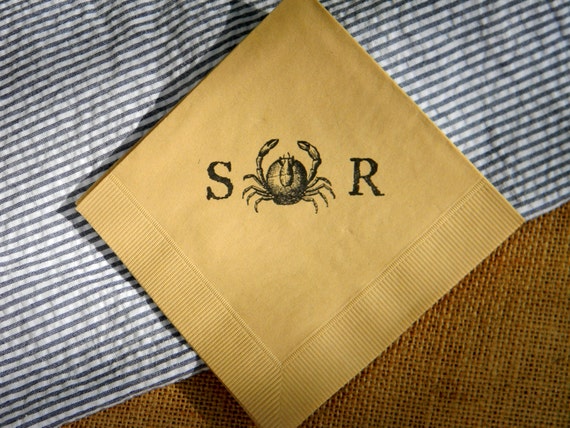
Personalized Crab Napkins with Couple's Initials
These napkins feature a vintage drawing of a crab flanked with the couple's initials on either side. These would be wonderful for a lowcountry boil or a crab boil! Seafood lovers DELIGHT!
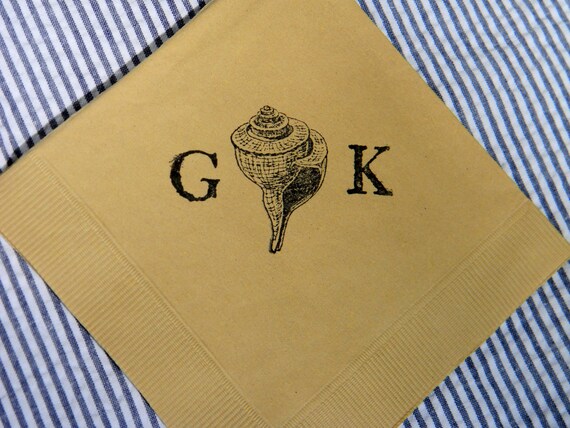
Personalized Conch Shell Napkins with Couple's Initials
These would be a wonderful addition to any beach wedding. Weather your wedding is here or abroad these napkins can go anywhere. Featuring a conch shell flanked by the couple's initials on either side.
I can personalize any of my designs. If you would like to add initials, names, or a wedding date I can work with you to make these napkins perfect for your event. Just email me at CharlestonCharms@gmail.com. I typically answer immediately. You can checkout these or any of my designs at www.handmadenapkins.com or www.charlestoncharms.etsy.com
Monday, May 6, 2013
The New Burlap Brown Napkins Have Arrived along with Butter Yellow!

 I am now offering two new colored napkins! This is great news since my previous supplier recently discontinued many popular colors including Burlap Brown, Coral, and Mint. I am really excited to introduce the new burlap brown which is a more accurate match to burlap fabric. I am using it for many of my example pictures and it looks great with any color combination! It is a light brownish tan instead of the previous mocha brown color. Oh and did I mention that it is made of recycled kraft paper? Yep, so it's more environmentally friendly too!
Light Yellow napkins are huge for me! I previously only had bright yellow options in Mimosa and School Bus which I wasn't a big fan of. This buttery color is so pretty and soft like lemon meringue. Yum! Even better news is these two colors are 3-ply instead of 2 which means more bang for your buck.
You can check these new listings out on my Etsy shop: http://www.CharlestonCharms.etsy.com
or my awesome new website: http://www.HandmadeNapkins.com
Subscribe to:
Posts (Atom)


