Showing posts with label Stephanie Berry. Show all posts

Monday, December 30, 2013

How to Make Your Own Rustic Wooden Breadboard Ipad Nook or Tablet Stand

Recently I was infatuated with a rustic tablet stand found on Pinterest. I didn't quite like the examples so I decided to make my own. I have a few friends and family with their own tablets so I thought it would make an awesome Christmas present! I was right and everyone loved them!!! They are so great for when you pull up a recipe on your tablet and don't want it laying flat on your counter top getting messed up. What's even better is they fold up and can be hung on a hook or tucked into a drawer when you don't need them.

Here are three of the stands I personalized

I ordered everything except the wood for the kickstand in the back online. 

What you need to get started:
  • Wooden bread board ( I got mine from and online web restaurant supplier for $6 a piece) 
  • Scrabble rack (I got 10 for under $5 on Amazon)
  • Small wooden board that is 1/2" thick and 1 1/2" wide (Mine was from Lowes in the hardwood section. You can get them in whatever wood is closest to your board)
  • Wood glue
  • Easel Hinges ( I got mine for 60 cents on a woodworking website. They have little prongs that are on both sides.)
  • Electric table saw
  • Mallet
  • Matching wood stain
  • Optional: Electric burn tool or paint


How to put it together:

  1. Get your piece of wood ready and cut it to 6 1/4" at a 15 degree angle at the bottom. 
  2. Mark the back of your board 7" up and place the closed hinge below that line. 
  3. Take your wood glue and put a few small drops on either side of the hinge. 
  4. Make sure your hinge and wood back is lined up on the board. Put the board on a flat surface like a good table with a flat piece of wood on it. Stone surfaces will make the board split when you tap the wood piece into place. 
  5. Take another small piece of wood (could be the remnant of the piece you cut from) and place it above the wood piece. You should be looking at bottom to top: Table, Bread board, hinge, wooden kickstand, extra board. Make sure the extra board covers the hinge portion evenly.
  6. With a mallet hit the stack where the hinge is 2-3 good times to make sure the hinge grips into the breadboard and kickstand. If it doesn't take some more glue and put it in the holes the hinge makes and press everything back into place, then flip the whole thing over with the breadboard facing up.
  7. If you want to stain your scrabble rack and kickstand wait until the glue dries first (I would wait at least 6 hours). Lightly brush on your stain to the scrabble rack and back board on the top, bottom, front and back. After it dries check and reapply if needed. 
  8. If you want to paint your board wait until hinge glue is dried. Paint all of your pieces, board, scrabble rack, and kickstand. For an antique white look: paint all over in an off white, let dry, go back and rub wood stain on the edges lightly and let dry. *Make sure there isn't any oil covering the breadboard. Some cutting boards come with a thin layer to treat the wood. If yours does then you will need to sand the board before you can start painting. 
  9. Glue your scrabble rack on to your bread board by applying a thin layer of glue to the back of the rack and evenly placing it an inch above the bottom. Wipe away any excess glue from the sides of the rack if needed.
  10. If you want to personalize the stand you can paint initials or burn them in with a burn tool. When using a burn tool I suggest sketching out your design first in pencil then burning over it. After you're finished go back with a good eraser. *Always be cautious when using a burn tool. Never leave the tool unattended when on and never allow small children around it. It reaches several hundred degrees Fahrenheit and causes serious instant burns when it contacts the skin (trust me I know!)
You're all done!! Now go and put that stand to work!

Wednesday, October 16, 2013

10 Ways to use Palmetto Love Roses in Your Southern Wedding

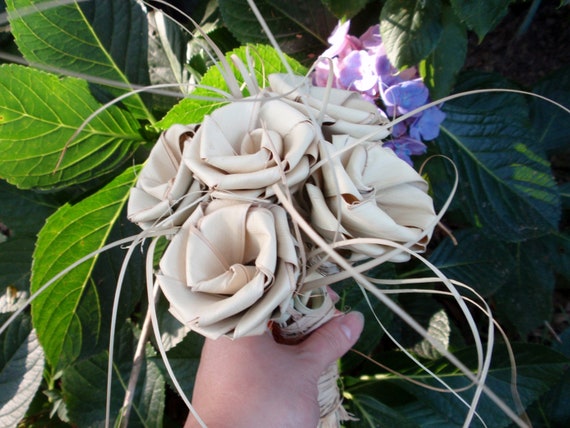
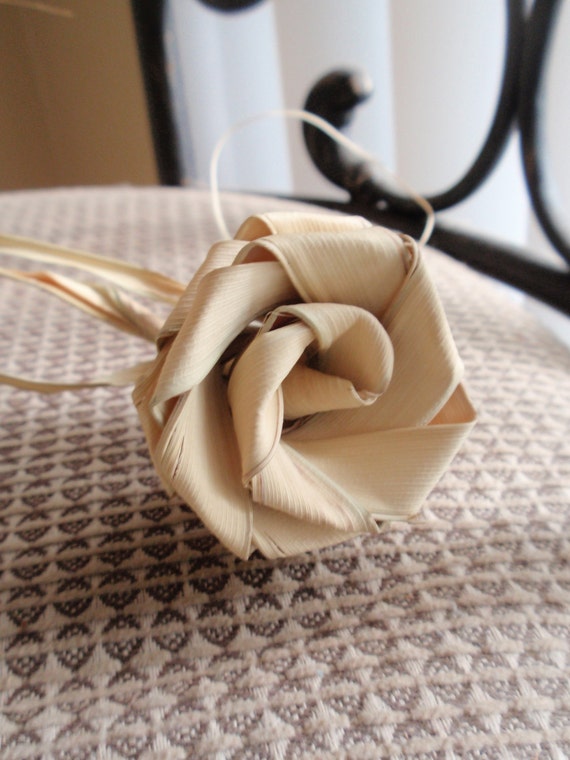
These beautiful roses are a Southern tradition harking back to the Civil War. Women would make them out of palmetto fronds and give them to the soldier they love. He was supposed to keep the rose with him always and bring it back to his love when he came home. The roses were supposed to last as long as their love. If you've ever taken a stroll in downtown Charleston you are likely to see vendors peddling these timeless works of art. Not only are they perfect for an alternative bouquet but the little flowers are great for many other uses in your wedding.

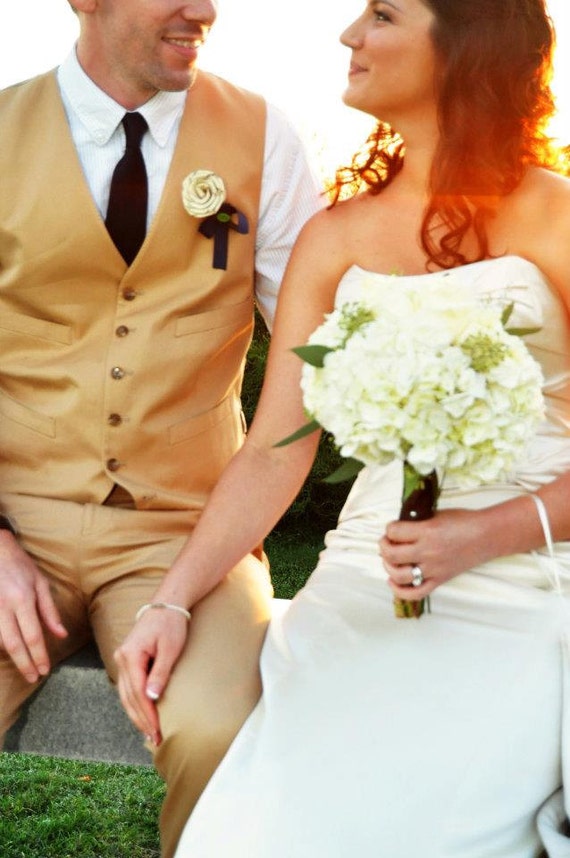
1. Alternative Bouquets
Since palm fronds won't wilt under the hot summer sun and can be made months in advance they are the perfect alternative to traditional flowers.

If you don't want all of your flowers to be the same or need a pop of color you can add them as a cool detail to a traditional bouquet. You can also try adding other dried flowers like baby's breath, tallow berries, pussy willow, or craspedia.

Using a natural or bright material to wrap the bottom of your bouquet adds interest as well. Burlap, ribbon, and raffia are all great choices!


2. Boutonnieres
These roses aren't so girly or frilly that any man could balk at wearing one. They are neutral and can go with a tux or a seersucker suit. They can also be paired with other flowers or left alone and still look great! That's the beauty of these little palmetto roses. Your man wearing the love rose on their lapel is similar to how they would've been worn originally.


3. Hair Accessories
If you aren't into fascinators, veils, and tiaras a love rose in your hair may be a great choice! They can be pinned or clipped in a loose bun. The best part is it's durability. These flowers can take a beating without the petals falling off... if only a real rose could say the same!


4. Table Decor
You can put these babies anywhere and I mean ANYWHERE! You could hang them from the rafters if you wanted. The most obvious would be to make them into centerpieces for the tables. They would be great for decorating the pews or rows during your ceremony and since they don't require any water you can just tie them in a bow.


5. Wedding Favors
Let your guests take home a real piece of history with a palmetto rose and a Thank you note and history attached by a ribbon.


6. Wedding Programs
Attach a palmetto love rose to each program, it can double as a favor this way and helps keep paper stiff with it's long stem. Tie with raffia or twine to add the to rustic feel!

7. Placeholders
Make a rustic statement by attaching your placeholders to a palmetto love rose. It can double as a wedding favor as well. By putting the rose on the table none of your guests will miss them at the end of the reception. 

8. Flower Girl Basket
If you find a particularly talented basket weaver at the Charleston Market you can buy a basket with a palmetto love rose included in it. 


9. Cake Topper
If you want your cake to match your bouquet you can make a little cake topper as well! It is safe to use on on food, and won't get messed up from being moved from cold to hot like some other flowers might. It is a ton cheaper than fondant flowers as well!


10. Alternative Ring Bearer Pillow
By tying the rings to one of these roses you can change the typical way the rings are presented.Your ring bearer presents each of you with a rose at the end of the aisle with a ring attached. Just make sure you tie the bows well.